Do you want to learn how to stand on your hands? or do you need a bit more control and technique for your handstand?
Then read along for this quick guide with 3 basic exercises on how to stand on your hands.
Where do I start?
First find a training buddy:
The best advice is to find a partner who can help you in the beginning. It can be a bit scary to swing yourself up in a handstand in the beginning without a “safety net”.
Then there’s your grip on the handles:

The grip on the handles should look approximately as on the photo. As a general rule, think about having your index fingers facing forwards. This gives your wrists the most healthy angle.
And now you’re ready for exercises!
3 basic exercises:
Three basic handstand positions are important to master. These are the foundation when you want to learn how to do a handstand and improve your handstand. Mastering these three will help you master various more difficult handstand positions and presses to handstand.
1. TUCK POSITION
What is this?
This position is similar to a regular straight handstand, except in the tuck position you bend down your legs instead of keeping them stretched up in the air.
Why is it a good position?
You get used to getting your hips up first.
A general mistake when doing a handstand is to swing up legs without bringing up the hips at the same time. And as long as the hips hang behind, you will fall back down on the ground.
With the tuck-position, you really learn to get up your hips.
This position also requires great core strength and strong shoulders which will quickly give you enough strength to hold your handstand.
Exercise: Swing your body up in the tuck position and hold for 5 to 10 seconds.
Focus:
Having a straight line from wrists to bottom without the shoulders falling out. If this is difficult, you need to practice a bit more shoulder flexibility.
2. STRADDLE/SPLIT POSITION
What is it?
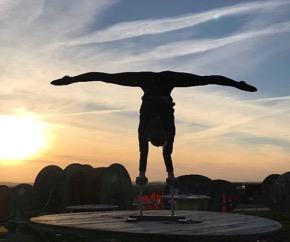
Holding the straddle position, your back is kept straight while your legs are held in a split position. The perfectly performed position means legs held horizontally while keeping the back vertically. This requires great flexibility of back and inner thighs.
Why is it a good position?
In the tuck position, the center of gravity in the middle of the body. The good thing about the straddle position is that the center of gravity is relocated a little bit because the legs are held far away from the core of the body. It is important to be able to control your handstand no matter where the center of gravity is.
Exercise:
Swing up to a straddle/split position with horizontally stretched legs. Hold this position for 5 to 10 seconds.
Focus:
Be careful not to bend your back to compensate for not having your legs completely in split. Keep your back straight for the whole time even though the legs are wide apart and therefore get heavier.
Video Straddle
As this gymnast needs a bit more flexibility in her split, her legs point slightly upwards. She keeps her legs here since she, if the lowers them further down, will start bending her back.
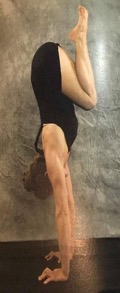
3. STRAIGHT HANDSTAND

What is it?
The straight handstand is in many ways the hardest to master because of its level of complexity. All muscles in the body will have to cooperate for obtaining the perfect straight line.
Why is it a good position?
Mastering the straight handstand position is essential. It is important to always be able to turn back to the straight handstand and know where you are. It’s easy to lose a bit of the feel with your body when turning upside down. This is why it’s important to have the straight handstand as starting point for other handstand positions and presses to handstand.
Exercise:
Find your straight handstand position through either the tuck or the split position. Start by holding your tuck or split position for 3 seconds before continuing to the straight position. Now you can move your legs into the straight position.
Focus:
Shoulders must be open, close by the ears and right above the wrists. The bottom must be right above the shoulders without resulting in a bent back. Feet are also to be kept right above the bottom.
N.B.:
The straight handstand is incredibly difficult to master and takes a lot of time to get under control.
When you have a good feel of the straight handstand, you of course need to keep practicing other positions and press to handstand. But it is good to turn back to the straight handstand once in a while.
If you need some help to master the straight handstand, then you can also invest in one of our handstand tools. They help your body adjust into a straight handstand position, while sparing your wrists from continuous stress when practicing. You can find our tools in the shop <— here.
Press for video:
Trough tuck to straight handstand
Through straddle to staight handstand
Straight handstand
This post is also available in: Dansk (Danish)

